Rapid screening for internal radioactive contamination: training resource
Training guide for NHS and emergency services staff on rapid screening of people for internal radioactive contamination.
Following an incident which releases radioactive material into the environment it may be necessary to monitor people for internal contamination. The immediate aim is to identify those with internal contamination levels high enough to require medical assessment. Monitoring should be carried out as soon as possible.
Internal contamination results when radioactive material is inhaled or ingested, while external contamination refers to radioactive material on skin and clothing. Monitoring for external contamination is not covered by this training.
This training package outlines the procedures to be followed for monitoring of internal contamination for 5 radionuclides using handheld radiation detectors and how these are used to identify people who require medical assessment. A comprehensive description of procedures can be found in the supporting guidance document HPA-CRCE-014: Guidance on screening people for internal radioactive contamination.
In the case of an event involving radionuclides that can not be detected using handheld radiation detectors other monitoring methods are available. These are not discussed in this training package, but details can be found in the guidance document.
This training guide is aimed at staff who have some experience of using a handheld radiation monitor. This includes NHS staff who have been trained to use the RAM GENE-1 monitor, staff from NHS medical physics departments and trained staff from other emergency services.
At the end of this guide there is a link to a short test, to gauge your level of understanding.
If you have any questions or comments about this training contact [email protected].
Monitoring of internal contamination: by different radionuclides
The identification of people who require medical assessment cannot be performed until the radionuclides have been identified.
Radionuclide identification must only be carried out by a suitably qualified radiation expert such as a radiation protection advisor (RPA).
Call Public Health England (PHE) on 01235 834 590 for advice on radionuclide identification.
If a single radionuclide is present then monitoring can be performed using selected handheld monitors for certain radionuclides. The advantage of this is that suitable monitors should be available locally and so measurements can begin soon after the incident is confirmed.
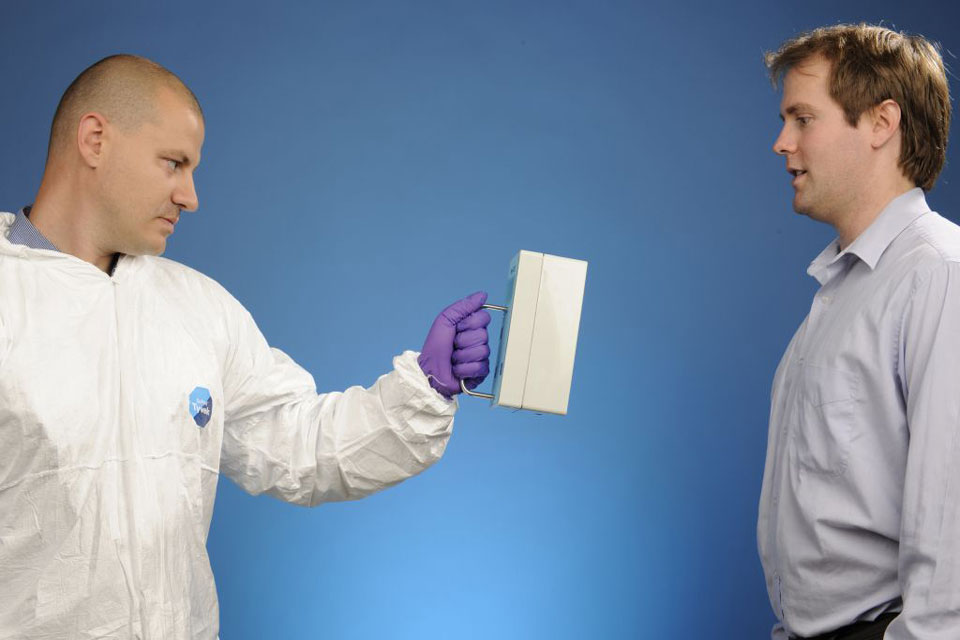
The following radionuclides can be assessed using handheld monitors:
| Radionuclide | Radiation types emitted |
|---|---|
| Cobalt-60 (60Co) | beta, gamma |
| Selenium-75 (75Se) | gamma |
| Iodine-131 (131I) | beta, gamma |
| Cesium-137 (137Cs) | beta, gamma |
| Iridium-192 (192Ir) | beta, gamma |
If a mixture of radionuclides is present, or the radionuclide is not listed above, then seek expert help before proceeding with monitoring.
Monitoring for internal contamination: handheld monitors
Due to the differences in sensitivity the associated action levels are different for each handheld instrument. An action level is the net count rate which if exceeded indicates the person needs immediate medical assessment.
Instrument-specific action levels are provided for a number of the most commonly used handheld instruments within the UK. Monitoring with other instruments is not recommended unless separate guidance is available.
The number of days post incident that instruments can be used are given below, together with the radionuclides and age groups that they are capable of assessing.
A space means that the instrument is not suitable for that radionuclide.
APTEC-NRC ADM-300 with BSP-100 probe
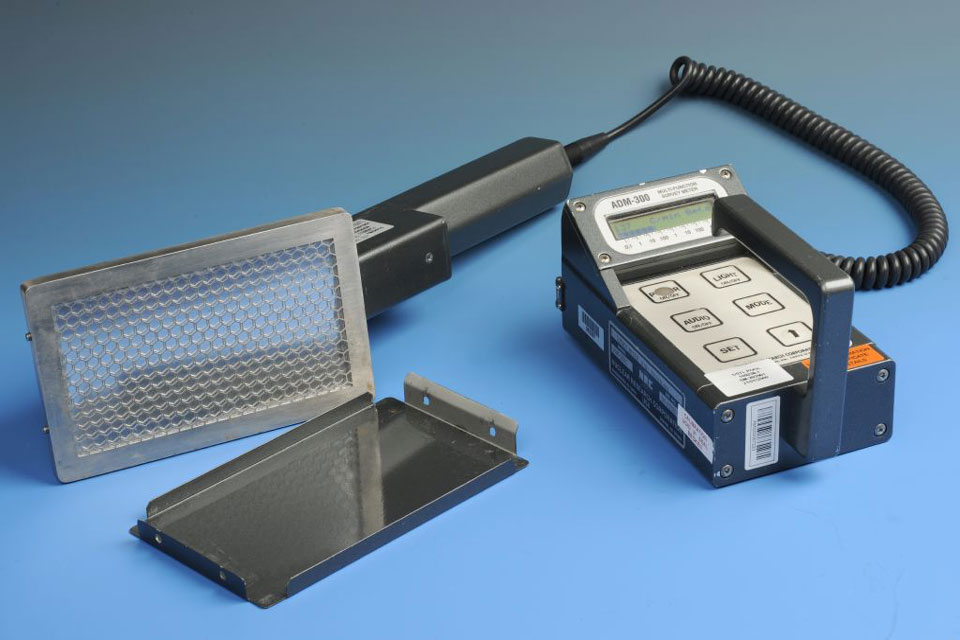
This table shows the number of days that radionuclides are detectable.
| Radionuclides | Age 0 to 10 years | Age 10 to 19 years | Age over 20 years |
|---|---|---|---|
| 60Co | 6 | 7 | 7 |
| 75Se | |||
| 131I | |||
| 137Cs | |||
| 192Ir |
RADOS RDS 200 with GMP-11 probe
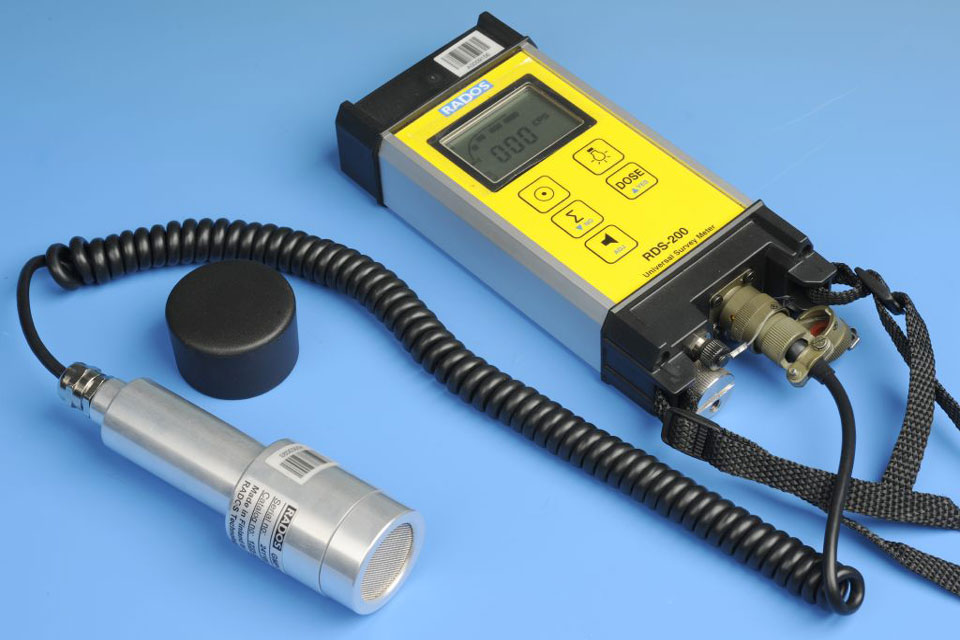
This table shows the number of days that radionuclides are detectable.
| Radionuclides | Age 0 to 10 years | Age 10 to 19 years | Age over 20 years |
|---|---|---|---|
| 60Co | |||
| 75Se | |||
| 131I | 8 | 20 | 20 |
| 137Cs | |||
| 192Ir |
ROTEM RAM Gene-1
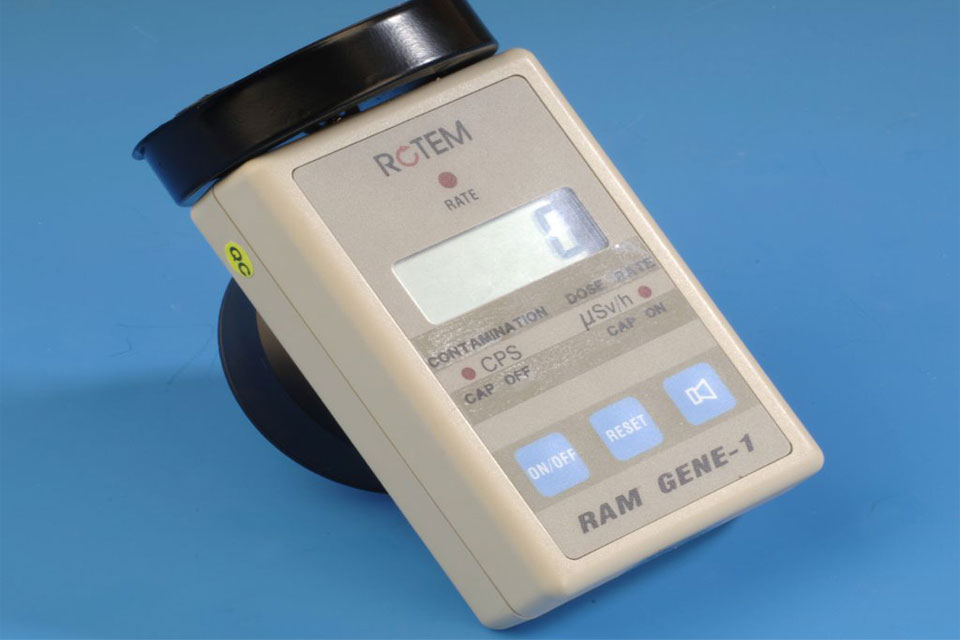
This table shows the number of days that radionuclides are detectable.
| Radionuclides | Age 0 to 10 years | Age 10 to 19 years | Age over 20 years |
|---|---|---|---|
| 60Co | 4 | 4 | 5 |
| 75Se | 30 | 30 | 30 |
| 131I | 12 | 30 | 30 |
| 137Cs | |||
| 192Ir | 3 | 6 | 8 |
Thermo Mini 900 with 44A probe
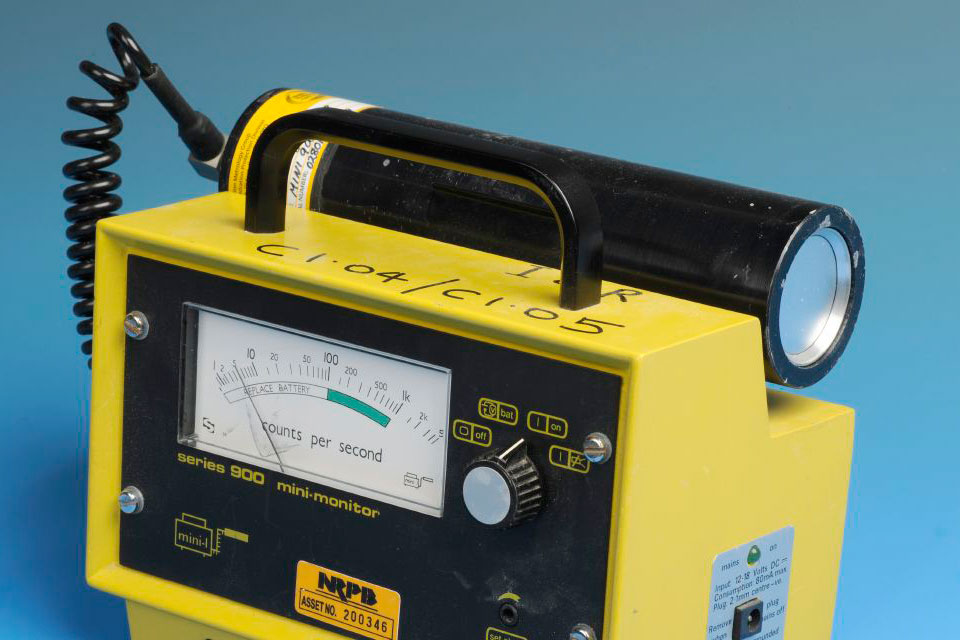
This table shows the number of days that radionuclides are detectable.
| Radionuclides | Age 0 to 10 years | Age 10 to 19 years | Age over 20 years |
|---|---|---|---|
| 60Co | 6 | 6 | 30 |
| 75Se | 30 | 30 | 30 |
| 131I | 30 | 30 | 30 |
| 137Cs | 6 | 14 | 30 |
| 192Ir | 30 | 30 | 30 |
TSA stystems PRM-470CS
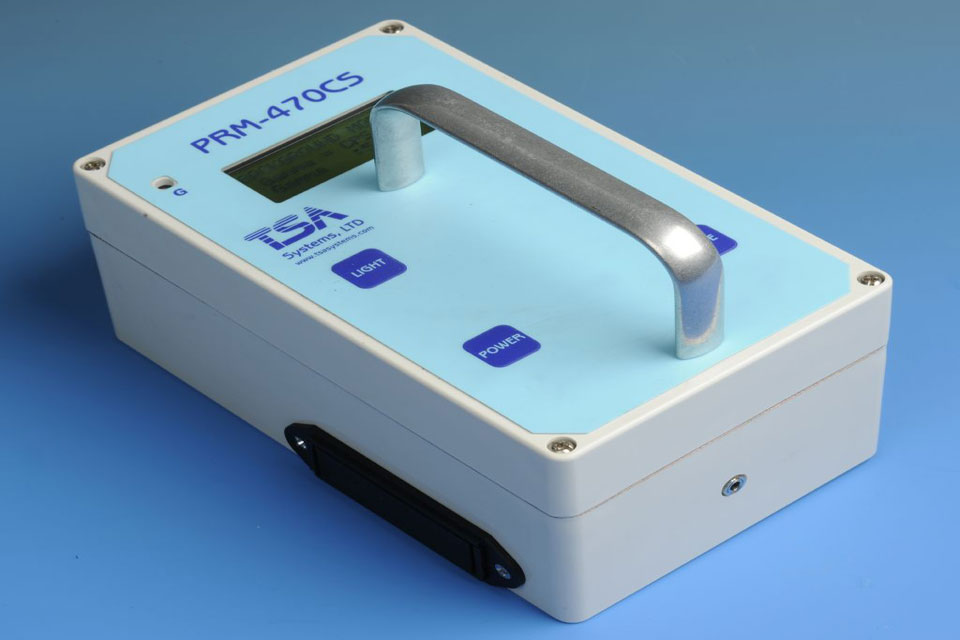
This table shows the number of days that radionuclides are detectable.
| Radionuclides | Age 0 to 10 years | Age 10 to 19 years | Age over 20 years |
|---|---|---|---|
| 60Co | 9 | 30 | 30 |
| 75Se | 30 | 30 | 30 |
| 131I | |||
| 137Cs | 5 | 7 | 20 |
| 192Ir | 30 | 30 | 30 |
SAIC Exploranium GR-135
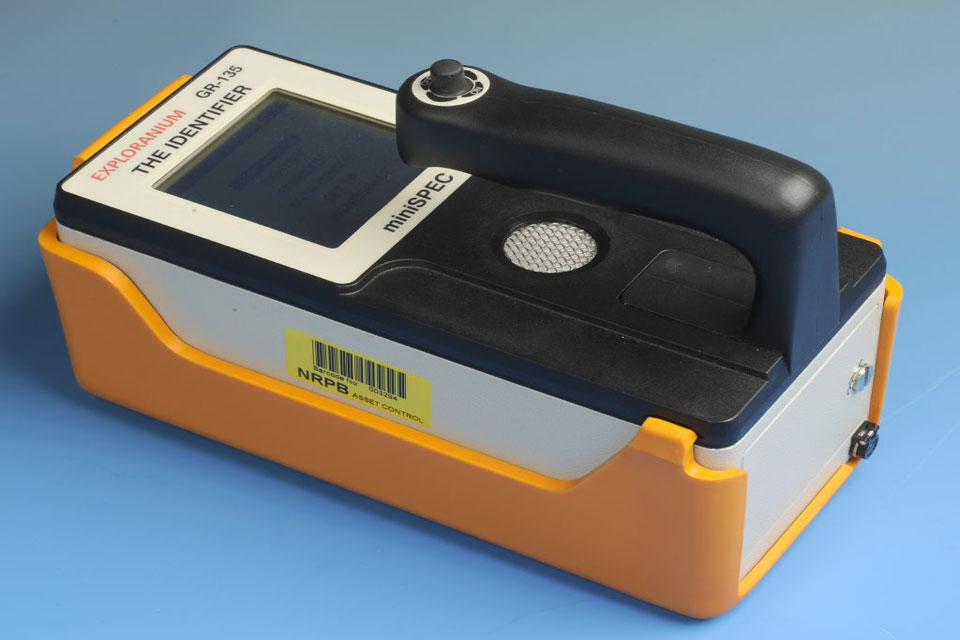
This table shows the number of days that radionuclides are detectable.
| Radionuclides | Age 0 to 10 years | Age 10 to 19 years | Age over 20 years |
|---|---|---|---|
| 60Co | 20 | 30 | 30 |
| 75Se | 30 | 30 | 30 |
| 131I | |||
| 137Cs | 6 | 7 | 30 |
| 192Ir | 30 | 30 | 30 |
Monitoring for internal contamination: urine monitoring
For other radionuclides, where monitoring with handheld monitors cannot be used, alternative methods are available to identify people who may have inhaled or ingested radioactive material. These methods are not described in this training package. However, some radionuclides can be assessed through urine monitoring.
This table shows the radionuclides assessed through urine monitoring.
| Radionuclide | Radiation type emitted |
|---|---|
| Strontium-90/Yttrium-90 (90Sr/90Y) | beta |
| Radium-226 (226Ra) | alpha, beta, gamma |
| Thorium-228 (228Th) | alpha, beta, gamma |
| Neptunium-237/Protactiunium-233 (237Np/233Pa) | alpha, gamma |
| Plutonium-238 (238Pu) | alpha |
| Americium-241 (241Am) | alpha, gamma |
| Californium-252 (252Cf) | alpha |
More information on urine monitoring for radionuclides can be found in the guidance document HPA-CRCE-014: Guidance on screening people for internal radioactive contamination.
Monitoring location and precautions
Monitoring location
Monitoring of people for internal and external contamination would normally be carried out at a temporary radiation monitoring unit (RMU), set up close to the incident. The setting up of this unit is not a part of this training. Guidance on setting up an RMU can be found in the document HPA-CRCE-017 - Radiation Monitoring Units: Planning and Operational Guidance. A template RMU plan will be published in 2015.
In summary:
- the RMU should be located in a covered area large enough to deal with the demand, providing adequate separation of people waiting for monitoring, being monitored, and awaiting transfer for further assessment
- decontamination facilities should be made available if it’s possible that external contamination could be present on people
- the monitoring should be carried out at a location where the levels of natural background radiation are not unusually high, and where levels have not been significantly enhanced by contamination from the incident
Monitoring precautions
The monitoring area in particular should be kept free of contamination. Chairs and floors should be covered so that they can be easily decontaminated.
Staff carrying out monitoring should wear suitable personal protective equipment (PPE). In all but extreme cases, the use of disposable coveralls, gloves and overshoes should provide adequate protection of staff carrying out monitoring of people.
Monitoring with handheld detectors
Reliable monitoring for internal contamination using handheld detectors is only possible where:
- external contamination is not present
- the radionuclide is known
Therefore, before internal contamination procedures can commence it will always be necessary to monitor for external contamination and to carry out decontamination procedures as required.
Where the radionuclide is initially unidentified, screening will enable identification of the most contaminated people, but it will not be possible to determine if the person needs medical assessment. As soon as the radionuclide is identified, the measurements previously made can be compared with appropriate action levels.
Radionuclide identification must only be carried out by a suitably qualified radiation expert such as a radiation protection advisor (RPA). Further advice on radionuclide identification can be provided by PHE.
Pre-measurement checks
Due to variations in sensitivity not all instruments can be used in all circumstances. Details of when particular instruments can be used is given in the ‘Monitoring for internal contamination section’.
Ensure that you are using a suitable instrument prior to proceeding with any measurements.
Before monitoring the following functional checks must be carried out:
- battery check
- background count
- response to check source (if available)
Instruction on carrying out functional checks for each detector type are provided in the ‘using your local detector’ section.
Administrative requirements
Sufficient information should be recorded for each person monitored to allow them to be uniquely identified. This must include:
- full name
- date of birth
- postcode
A complete monitoring record will include as a minimum:
- the instrument used
- background count rate (BCR)
- net count rate (total count rate - BCR = net count rate)
- whether the action level has been exceeded
Sample forms are available in HPA-CRCE-014: Guidance on Screening People for Internal Radioactive Contamination.
Monitoring with handheld detectors: procedure and action levels
Procedure
The procedure is as follows:
- ensure adequate distance between person being monitored and people waiting
- each person should be taken individually to the monitoring area maintaining a distance of at least 5 metres between the person being monitored and other potentially contaminated people
- young children need not be separated from parents or guardians
- position the detector
- 131I: as Iodine accumulates in the thyroid the instrument being used must be placed close to the skin at the base of the front of the neck
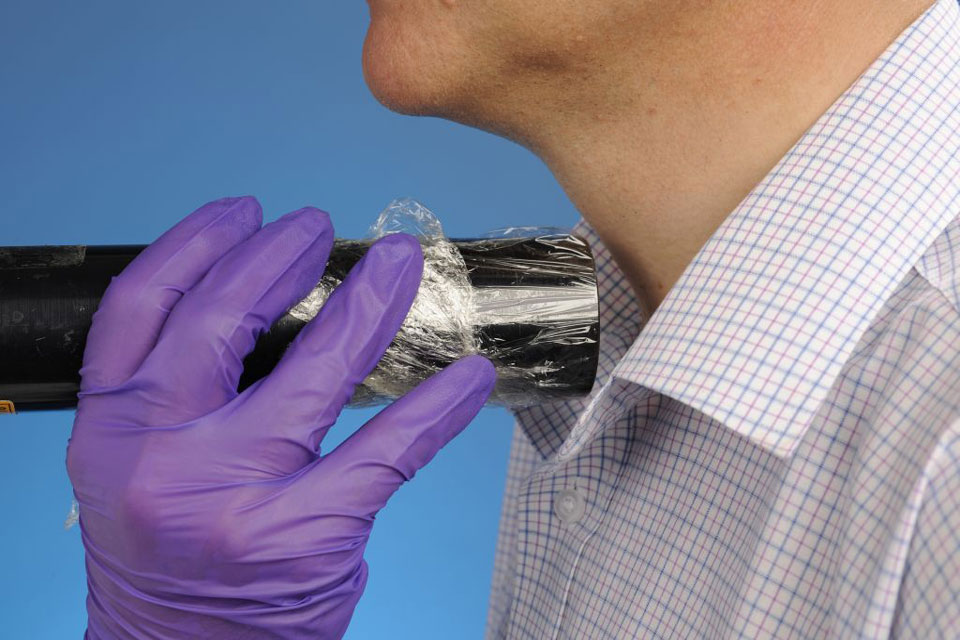
- for all other nuclides the detector should be held 30 cm from the centre of the chest
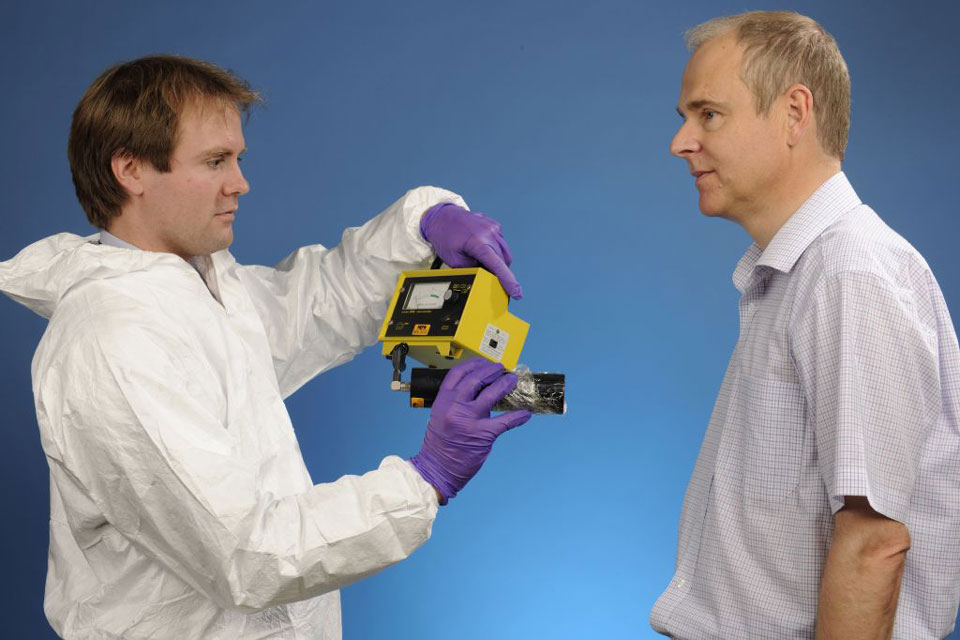
- record the measurement
- wait for about 10 seconds for the reading to stabilise and record the highest indicated detector count rate
- some instruments take longer to stabilise. For these the reading should be observed until it is stable
- note the units, counts per second (cps) or counts per minute (cpm). The BCR is subtracted from the total count rate measurement, to yield a net count rate
Action levels
The net count rate is compared to tables of action levels. If the action level is exceeded this means the person’s dose could exceed a threshold level.
Action levels are provided in the ‘using your local detector’ section, and are dependent on the:
- instrument being used
- age of the person being monitored
- radionuclide being assessed
- time between radionuclide intake and monitoring
If a net count rate exceeds the action level:
- urgently refer the person for medical assessment
- arrange for accurate measurements to be made
Accurate assessment will be performed using specialised transportable or laboratory based counting systems. Further details can be obtained from PHE.
Using your local detector
APTEC-NRC ADM-300 with BSP-100 probe
This table shows the radionuclides and maximum times between incident and measurement that this detector is suitable for.
| Age group | Cobalt-60 (60Co) | Selenium-75 (75Se) | Cesium-137 (137Cs) | Iridium-192 (192Ir) | Iodine-131 (131I) |
|---|---|---|---|---|---|
| Under 10 years | 6 | - | - | - | - |
| 10 to 19 years | 7 | - | - | - | - |
| 20+ years | 7 | - | - | - | - |
Pre-monitoring checks
The following procedure should be followed prior to using the detector:
- Remove the probe cover.
- Press and hold the POWER button until the instrument responds.
- Press ↑ to change the mode to ‘c/min B+G’. Response is given in cpm. This instrument requires a lengthy (~ 30 second) stabilisation time when changing from a low to high (or vice versa) count rate.
- Make sure that the battery low indicator is not shown. If it is, replace the batteries.
- Ensure that the BCR is approximately 180 cpm.
- Check response with a check-source if available.
- Instrument is now ready. The detector window should face the person being monitored.
- Press and hold the POWER button to switch the instrument off.
Action levels
The tables below outlines the action levels for this instrument for each radionuclide and age group. “-“ indicates that the detector is not suitable for that combination of radionuclide, time since incident and age group.
ADM-300 with BSP-100
This table shows the action levels for ADM-300 with BSP-100 probe (cpm).
60Co
| Time between incident and measurement (days) | under 10 years | age 10 to 19 years | age 20+ years |
|---|---|---|---|
| 0 | 1400 | 2500 | 2700 |
| 1 | 1400 | 2400 | 2700 |
| 2 | 1300 | 2200 | 2500 |
| 3 | 1200 | 2100 | 2300 |
| 4 | 1100 | 2000 | 2200 |
| 5 | 900 | 1800 | 2000 |
| 6 | 480 | 890 | 1000 |
| 7 | - | 510 | 600 |
| 8 | - | - | - |
| 9 | - | - | - |
| 10 | - | - | - |
| 11 to 12 | - | - | - |
| 13 to 14 | - | - | - |
| 15 to 16 | - | - | - |
| 17 to 18 | - | - | - |
| 19 to 20 | - | - | - |
| 21 to 30 | - | - | - |
RADOS RDS 200 with GMP-11 probe
This table shows the radionuclides and maximum times between incident and measurement that this detector is suitable for.
| Age group | Cobalt-60 (60Co) | Selenium-75 (75Se) | Cesium-137 (137Cs) | Iridium-192 (192Ir) | Iodine-131 (131I) |
|---|---|---|---|---|---|
| Under 10 years | - | - | - | - | 8 |
| 10 to 19 years | - | - | - | - | 20 |
| 20+ years | - | - | - | - | 20 |
Pre-monitoring checks
The following procedure should be followed prior to using the detector:
- Remove metal cover from connector at handle end and attach probe.
- Remove probe cover.
- Press the POWER button to switch on and wait until instrument automatically enters cps mode.
- Make sure that the battery low indicator is not shown. If it is, replace the batteries.
- Ensure that the BCR is approximately 1 cps.
- Check response with a check-source if available.
- Instrument is now ready for measurements.
Action levels
This table outlines the action levels for RADOS RDS200 with GMP-11 probe (cps), for each radionuclide and age group. “-“ indicates that the detector is not suitable for that combination of radionuclide, time since incident and age group.
131I
| Time between incident and measurement (days) | under 10 years | age 10 to 19 years | age 20+ years |
|---|---|---|---|
| 0 | 5 | 18 | 17 |
| 1 | 10 | 32 | 30 |
| 2 | 10 | 34 | 32 |
| 3 | 9 | 32 | 30 |
| 4 | 8 | 29 | 28 |
| 5 | 8 | 28 | 26 |
| 6 | 7 | 26 | 24 |
| 7 | 6 | 23 | 22 |
| 8 | 5 | 22 | 21 |
| 9 | - | 21 | 19 |
| 10 | - | 18 | 18 |
| 11 to 12 | - | 16 | 15 |
| 13 to 14 | - | 13 | 13 |
| 15 to 16 | - | 12 | 11 |
| 17 to 18 | - | 10 | 9 |
| 19 to 20 | - | 8 | 8 |
| 21 to 30 | - | - | - |
ROTEM RAM GENE-1
This table shows the radionuclides and maximum times between incident and measurement that this detector is suitable for.
| Age group | Cobalt-60 (60Co) | Selenium-75 (75Se) | Cesium-137 (137Cs) | Iridium-192 (192Ir) | Iodine-131 (131I) |
|---|---|---|---|---|---|
| Under 10 years | 4 | 30 | - | 3 | 12 |
| 10 to 19 years | 4 | 30 | - | 6 | 30 |
| 20+ years | 5 | 30 | - | 8 | 30 |
Pre-monitoring checks
The following procedure should be followed prior to using the detector.
- Turn instrument on. If it fails to start, change batteries and re-start.
- Perform a function test as follows: * turns instrument on * ensure that the audio sounds continuously for approximately 1 second * ensure that the RATE LED illuminates continuously for approximately 1 second * ensure that the liquid crystal display shows 8.8 : 8.8
- Set the instrument to the contamination mode – CAP OFF.
- Ensure that the CONTAMINATION LED is illuminated continuously.
- Observe for at least 10 seconds and ensure that the audio bleeps and the RATE LED illuminates intermittently.
- Ensure that the BCR is between 0 and 1 cps.
- Check response with a check-source if available.
- Instrument is now ready for measurements.
Action levels
These tables outline the action levels for ROTEM RAM GENE-1, for each radionuclide and age group. “-“ indicates that the detector is not suitable for that combination of radionuclide, time since incident and age group.
60Co
| Time between incident and measurement (days) | Under 10 years | Age 10 to 19 years | Age 20+ years |
|---|---|---|---|
| 0 | 6 | 7 | 11 |
| 1 | 6 | 7 | 11 |
| 2 | 5 | 6 | 10 |
| 3 | 5 | 6 | 9 |
| 4 | 5 | 6 | 9 |
| 5 | - | - | 8 |
| 6 | - | - | - |
| 7 | - | - | - |
| 8 | - | - | - |
| 9 | - | - | - |
| 10 | - | - | - |
| 11 to 12 | - | - | - |
| 13 to 14 | - | - | - |
| 15 to 16 | - | - | - |
| 17 to 18 | - | - | - |
| 19 to 20 | - | - | - |
| 21 to 30 | - | - | - |
75Se
| Time between incident and measurement (days) | Under 10 years | Age 10 to 19 years | Age 20+ years |
|---|---|---|---|
| 0 | 120 | 180 | 440 |
| 1 | 120 | 180 | 430 |
| 2 | 110 | 170 | 410 |
| 3 | 110 | 160 | 390 |
| 4 | 110 | 160 | 380 |
| 5 | 100 | 150 | 360 |
| 6 | 100 | 150 | 350 |
| 7 | 100 | 140 | 340 |
| 8 | 100 | 140 | 340 |
| 9 | 90 | 140 | 330 |
| 10 | 90 | 130 | 320 |
| 11 to 12 | 90 | 130 | 310 |
| 13 to 14 | 90 | 120 | 300 |
| 15 to 16 | 80 | 120 | 290 |
| 17 to 18 | 80 | 110 | 280 |
| 19 to 20 | 80 | 110 | 270 |
| 21 to 30 | 65 | 100 | 230 |
192Ir
| Time between incident and measurement (days) | Under 10 years | Age 10 to 19 years | Age 20+ years |
|---|---|---|---|
| 0 | 11 | 26 | 38 |
| 1 | 11 | 24 | 35 |
| 2 | 7 | 18 | 27 |
| 3 | 5 | 15 | 23 |
| 4 | - | 13 | 20 |
| 5 | - | 11 | 19 |
| 6 | - | 6 | 10 |
| 7 | - | - | 7 |
| 8 | - | - | 6 |
| 9 | - | - | - |
| 10 | - | - | - |
| 11 to 12 | - | - | - |
| 13 to 14 | - | - | - |
| 15 to 16 | - | - | - |
| 17 to 18 | - | - | - |
| 19 to 20 | - | - | - |
| 21 to 30 | - | - | - |
131I
| Time between incident and measurement (days) | Under 10 years | Age 10 to 19 years | Age 20+ years |
|---|---|---|---|
| 0 | 9 | 32 | 30 |
| 1 | 17 | 55 | 53 |
| 2 | 18 | 59 | 55 |
| 3 | 15 | 55 | 52 |
| 4 | 13 | 50 | 48 |
| 5 | 12 | 48 | 45 |
| 6 | 10 | 44 | 42 |
| 7 | 9 | 40 | 39 |
| 8 | 8 | 38 | 36 |
| 9 | 7 | 36 | 33 |
| 10 | 6 | 32 | 31 |
| 11 to 12 | - | 27 | 26 |
| 13 to 14 | - | 23 | 23 |
| 15 to 16 | - | 20 | 20 |
| 17 to 18 | - | 17 | 17 |
| 19 to 20 | - | 14 | 14 |
| 21 to 30 | - | 6 | 6 |
SAIC Exploranium GR-135
This table shows the radionuclides and maximum times between incident and measurement that this detector is suitable for.
| Age group | Cobalt-60 (60Co) | Selenium-75 (75Se) | Cesium-137 (137Cs) | Iridium-192 (192Ir) | Iodine-131 (131I) |
|---|---|---|---|---|---|
| Under 10 years | 20 | 30 | 6 | 30 | - |
| 10 to 19 years | 30 | 30 | 7 | 30 | - |
| 20+ years | 30 | 30 | 30 | 30 | - |
Pre-monitoring checks
The following procedure should be followed prior to using the detector:
- Protective ‘boot’ should be in place.
- Switch the instrument on by pulling the joystick back and hold it until TESTING appears on the display * use the joystick to navigate the menus: a quick movement of the joystick will move the cursor, but to select an option, ‘enter’, or ‘return’ pull the joystick back and hold briefly
- Select ‘Search and Dose’ from the main menu (the count rate in cps is displayed near the top of the display).
- Make sure that the battery low indicator is not shown. If it is, replace the batteries.
- Ensure that the BCR is approximately 50 cps.
- Check response with a check-source if available.
- For measurements of people the display screen should be held horizontally so that the end of the detector faces the person.
- Switch off by pushing the joystick forward and holding it until the countdown ends and the display is blank.
Action levels
The table below outlines the action levels for SAIC Exploranium GR-135 (cps), for each radionuclide and age group. “-“ indicates that the detector is not suitable for that combination of radionuclide, time since incident and age group.
60Co
| Time between incident and measurement (days) | Under 10 years | Age 10 to 19 years | Age 20+ years |
|---|---|---|---|
| 0 | 340 | 530 | 750 |
| 1 | 330 | 520 | 750 |
| 2 | 300 | 460 | 680 |
| 3 | 300 | 430 | 630 |
| 4 | 270 | 420 | 610 |
| 5 | 210 | 380 | 560 |
| 6 | 110 | 190 | 290 |
| 7 | 60 | 110 | 160 |
| 8 | 40 | 73 | 110 |
| 9 | 35 | 61 | 95 |
| 10 | 30 | 55 | 85 |
| 11 to 12 | 30 | 50 | 80 |
| 13 to 14 | 25 | 47 | 75 |
| 15 to 16 | 25 | 45 | 75 |
| 17 to 18 | 23 | 42 | 68 |
| 19 to 20 | 23 | 40 | 66 |
| 21 to 30 | - | 36 | 59 |
75Se
| Time between incident and measurement (days) | Under 10 years | Age 10 to 19 years | Age 20+ years |
|---|---|---|---|
| 0 | 12000 | 24000 | 42000 |
| 1 | 12000 | 23000 | 41000 |
| 2 | 12000 | 22000 | 39000 |
| 3 | 11000 | 21000 | 37000 |
| 4 | 11000 | 20000 | 36000 |
| 5 | 10000 | 20000 | 35000 |
| 6 | 10000 | 20000 | 33000 |
| 7 | 9800 | 19000 | 33000 |
| 8 | 9600 | 18000 | 32000 |
| 9 | 9400 | 18000 | 31000 |
| 10 | 9200 | 17000 | 31000 |
| 11 to 12 | 8900 | 17000 | 29000 |
| 13 to 14 | 8500 | 16000 | 28000 |
| 15 to 16 | 8200 | 15000 | 28000 |
| 17 to 18 | 7900 | 15000 | 26000 |
| 19 to 20 | 7700 | 15000 | 26000 |
| 21 to 30 | 6500 | 13000 | 22000 |
137Cs
| Time between incident and measurement (days) | Under 10 years | Age 10 to 19 years | Age 20+ years |
|---|---|---|---|
| 0 | 150 | 260 | 320 |
| 1 | 150 | 250 | 320 |
| 2 | 130 | 230 | 290 |
| 3 | 130 | 210 | 270 |
| 4 | 120 | 210 | 260 |
| 5 | 120 | 200 | 250 |
| 6 | 100 | 170 | 230 |
| 7 | - | 110 | 170 |
| 8 | - | - | 140 |
| 9 | - | - | 130 |
| 10 | - | - | 130 |
| 11 to 12 | - | - | 120 |
| 13 to 14 | - | - | 120 |
| 15 to 16 | - | - | 120 |
| 17 to 18 | - | - | 120 |
| 19 to 20 | - | - | 120 |
| 21 to 30 | - | - | 110 |
192Ir
| Time between incident and measurement (days) | Under 10 years | Age 10 to 19 years | Age 20+ years |
|---|---|---|---|
| 0 | 1300 | 3300 | 4400 |
| 1 | 1200 | 3000 | 4000 |
| 2 | 860 | 2300 | 3100 |
| 3 | 650 | 1900 | 2600 |
| 4 | 560 | 1700 | 2300 |
| 5 | 500 | 1400 | 2200 |
| 6 | 360 | 740 | 1200 |
| 7 | 260 | 480 | 790 |
| 8 | 200 | 390 | 640 |
| 9 | 180 | 350 | 570 |
| 10 | 180 | 330 | 540 |
| 11 to 12 | 160 | 310 | 520 |
| 13 to 14 | 160 | 300 | 510 |
| 15 to 16 | 150 | 290 | 490 |
| 17 to 18 | 140 | 280 | 470 |
| 19 to 20 | 140 | 270 | 450 |
| 21 to 30 | 120 | 230 | 380 |
Thermo MINI 900 with 44A probe
This table shows the radionuclides and maximum times between incident and measurement that this detector is suitable for.
| Age group | Cobalt-60 (60Co) | Selenium-75 (75Se) | Cesium-137 (137Cs) | Iridium-192 (192Ir) | Iodine-131 (131I) |
|---|---|---|---|---|---|
| Under 10 years | 6 | 30 | 6 | 30 | 30 |
| 10 to 19 years | 6 | 30 | 14 | 30 | 30 |
| 20+ years | 30 | 30 | 30 | 30 | 30 |
Pre-monitoring checks
The following procedure should be followed prior to using the detector:
- Remove cap.
- Turn rotary switch to first position ‘battery check’. If needle does not indicate in the green part of the display then replace battery and re-start procedure.
- Turn rotary dial to extreme clockwise position. Wait for a few seconds and ensure the background count rate is approximately 5 counts per second.
- Check response with a check-source if available.
- Instrument is now ready for measurements.
Action levels
The table below outlines the action levels for this instrument for each radionuclide and age group. “-“ indicates that the detector is not suitable for that combination of radionuclide, time since incident and age group.
60Co
| Time between incident and measurement (days) | Under 10 years | Age 10 to 19 years | Age 20+ years |
|---|---|---|---|
| 0 | 35 | 60 | 140 |
| 1 | 35 | 60 | 140 |
| 2 | 30 | 55 | 130 |
| 3 | 30 | 50 | 120 |
| 4 | 30 | 50 | 110 |
| 5 | 25 | 45 | 100 |
| 6 | 10 | 20 | 55 |
| 7 | - | - | 30 |
| 8 | - | - | 20 |
| 9 | - | - | 15 |
| 10 | - | - | 15 |
| 11 to 12 | - | - | 15 |
| 13 to 14 | - | - | 14 |
| 15 to 16 | - | - | 14 |
| 17 to 18 | - | - | 13 |
| 19 to 20 | - | - | 12 |
| 21 to 30 | - | - | 10 |
75Se
| Time between incident and measurement (days) | Under 10 years | Age 10 to 19 years | Age 20+ years |
|---|---|---|---|
| 0 | 4800 | 7600 | 18000 |
| 1 | 4800 | 7300 | 18000 |
| 2 | 4600 | 7000 | 17000 |
| 3 | 4500 | 6800 | 16000 |
| 4 | 4300 | 6500 | 16000 |
| 5 | 4200 | 6200 | 15000 |
| 6 | 4000 | 6200 | 15000 |
| 7 | 3900 | 5900 | 14000 |
| 8 | 3800 | 5700 | 14000 |
| 9 | 3700 | 5900 | 14000 |
| 10 | 3700 | 5400 | 13000 |
| 11 to 12 | 3600 | 5400 | 13000 |
| 13 to 14 | 3400 | 5100 | 12000 |
| 15 to 16 | 3300 | 4900 | 12000 |
| 17 to 18 | 3200 | 4900 | 12000 |
| 19 to 20 | 3100 | 4600 | 11000 |
| 21 to 30 | 2600 | 4000 | 9500 |
137Cs
| Time between incident and measurement (days) | Under 10 years | Age 10 to 19 years | Age 20+ years |
|---|---|---|---|
| 0 | 20 | 35 | 70 |
| 1 | 20 | 35 | 70 |
| 2 | 20 | 35 | 65 |
| 3 | 15 | 30 | 60 |
| 4 | 15 | 30 | 60 |
| 5 | 15 | 25 | 60 |
| 6 | 12 | 25 | 50 |
| 7 | - | 15 | 40 |
| 8 | - | 10 | 30 |
| 9 | - | 10 | 30 |
| 10 | - | 10 | 30 |
| 11 to 12 | - | 10 | 30 |
| 13 to 14 | - | 10 | 30 |
| 15 to 16 | - | - | 25 |
| 17 to 18 | - | - | 25 |
| 19 to 20 | - | - | 25 |
| 21 to 30 | - | - | 25 |
192Ir
| Time between incident and measurement (days) | Under 10 years | Age 10 to 19 years | Age 20+ years |
|---|---|---|---|
| 0 | 300 | 600 | 1300 |
| 1 | 300 | 600 | 1200 |
| 2 | 200 | 400 | 900 |
| 3 | 150 | 400 | 700 |
| 4 | 100 | 300 | 700 |
| 5 | 100 | 300 | 650 |
| 6 | 70 | 150 | 400 |
| 7 | 60 | 100 | 200 |
| 8 | 40 | 80 | 200 |
| 9 | 30 | 70 | 150 |
| 10 | 30 | 65 | 150 |
| 11 to 12 | 30 | 60 | 150 |
| 13 to 14 | 25 | 60 | 150 |
| 15 to 16 | 25 | 60 | 140 |
| 17 to 18 | 25 | 55 | 140 |
| 19 to 20 | 25 | 55 | 130 |
| 21 to 30 | 20 | 45 | 100 |
131I
| Time between incident and measurement (days) | Under 10 years | Age 10 to 19 years | Age 20+ years |
|---|---|---|---|
| 0 | 400 | 1600 | 1600 |
| 1 | 800 | 3000 | 3000 |
| 2 | 900 | 3000 | 3000 |
| 3 | 800 | 3000 | 2500 |
| 4 | 700 | 2500 | 2500 |
| 5 | 600 | 2500 | 2000 |
| 6 | 600 | 2500 | 2000 |
| 7 | 500 | 2000 | 2000 |
| 8 | 400 | 2000 | 2000 |
| 9 | 400 | 2000 | 1500 |
| 10 | 350 | 1500 | 1600 |
| 11 to 12 | 300 | 1400 | 1500 |
| 13 to 14 | 200 | 1200 | 1200 |
| 15 to 16 | 200 | 1000 | 1000 |
| 17 to 18 | 150 | 800 | 800 |
| 19 to 20 | 120 | 700 | 700 |
| 21 to 30 | 40 | 300 | 300 |
TSA Systems PRM-470CS
This table shows the radionuclides and maximum times between incident and measurement that this detector is suitable for.
| Age group | Cobalt-60 (60Co) | Selenium-75 (75Se) | Cesium-137 (137Cs) | Iridium-192 (192Ir) | Iodine-131 (131I) |
|---|---|---|---|---|---|
| Under 10 years | 9 | 30 | 5 | 30 | - |
| 10 to 19 years | 30 | 30 | 7 | 30 | - |
| 20+ years | 30 | 30 | 20 | 30 | - |
Pre-monitoring checks
The following procedure should be followed prior to using the detector:
- Press the POWER button to switch on.
- Allow the instrument to finish the auto background count, then press the ‘MODE’ button to enter search mode.
- Response is given in cps.
- Make sure that the battery low indicator is not shown. If it is, replace the batteries.
- Ensure that the BCR is approximately 70 cps.
- Check response with a check-source if available.
- For measurements of people the display screen should be held vertically so that the base of the detector faces the person.
- Press the POWER button to switch off.
Action levels
These tables outline the action levels for TSA Systems PRM-470CS (cps), for each radionuclide and age group. “-“ indicates that the detector is not suitable for that combination of radionuclide, time since incident and age group.
60Co
| Time between incident and measurement (days) | Under 10 years | Age 10 to 19 years | Age 20+ years |
|---|---|---|---|
| 0 | 430 | 670 | 920 |
| 1 | 420 | 650 | 920 |
| 2 | 380 | 590 | 840 |
| 3 | 350 | 550 | 780 |
| 4 | 340 | 530 | 750 |
| 5 | 260 | 490 | 690 |
| 6 | 140 | 240 | 360 |
| 7 | 80 | 140 | 200 |
| 8 | 55 | 90 | 140 |
| 9 | 45 | 75 | 120 |
| 10 | - | 70 | 110 |
| 11 to 12 | - | 63 | 100 |
| 13 to 14 | - | 59 | 92 |
| 15 to 16 | - | 56 | 92 |
| 17 to 18 | - | 53 | 84 |
| 19 to 20 | - | 50 | 82 |
| 21 to 30 | - | 45 | 72 |
75Se
| Time between incident and measurement (days) | Under 10 years | Age 10 to 19 years | Age 20+ years |
|---|---|---|---|
| 0 | 16000 | 28000 | 48000 |
| 1 | 15000 | 27000 | 47000 |
| 2 | 15000 | 26000 | 45000 |
| 3 | 15000 | 25000 | 42000 |
| 4 | 14000 | 24000 | 41000 |
| 5 | 14000 | 23000 | 38000 |
| 6 | 13000 | 23000 | 37000 |
| 7 | 13000 | 22000 | 37000 |
| 8 | 13000 | 21000 | 37000 |
| 9 | 13000 | 21000 | 36000 |
| 10 | 12000 | 21000 | 35000 |
| 11 to 12 | 12000 | 20000 | 34000 |
| 13 to 14 | 11000 | 19000 | 32000 |
| 15 to 16 | 11000 | 18000 | 31000 |
| 17 to 18 | 10000 | 18000 | 30000 |
| 19 to 20 | 10000 | 17000 | 29000 |
| 21 to 30 | 8600 | 15000 | 25000 |
137Cs
| Time between incident and measurement (days) | Under 10 years | Age 10 to 19 years | Age 20+ years |
|---|---|---|---|
| 0 | 230 | 330 | 390 |
| 1 | 200 | 310 | 380 |
| 2 | 180 | 290 | 350 |
| 3 | 170 | 260 | 320 |
| 4 | 160 | 260 | 320 |
| 5 | 150 | 250 | 310 |
| 6 | - | 220 | 280 |
| 7 | - | 140 | 200 |
| 8 | - | - | 170 |
| 9 | - | - | 160 |
| 10 | - | - | 150 |
| 11 to 12 | - | - | 150 |
| 13 to 14 | - | - | 150 |
| 15 to 16 | - | - | 140 |
| 17 to 18 | - | - | 140 |
| 19 to 20 | - | - | 140 |
| 21 to 30 | - | - | - |
192Ir
| Time between incident and measurement (days) | Under 10 years | Age 10 to 19 years | Age 20+ years |
|---|---|---|---|
| 0 | 1700 | 4300 | 5200 |
| 1 | 1600 | 3900 | 4800 |
| 2 | 1100 | 3000 | 3700 |
| 3 | 850 | 2500 | 3100 |
| 4 | 740 | 2200 | 2700 |
| 5 | 660 | 1800 | 2600 |
| 6 | 480 | 950 | 1400 |
| 7 | 340 | 620 | 930 |
| 8 | 270 | 510 | 750 |
| 9 | 230 | 460 | 670 |
| 10 | 230 | 420 | 630 |
| 11 to 12 | 210 | 400 | 600 |
| 13 to 14 | 200 | 390 | 580 |
| 15 to 16 | 200 | 380 | 550 |
| 17 to 18 | 190 | 360 | 540 |
| 19 to 20 | 180 | 350 | 520 |
| 21 to 30 | 160 | 300 | 450 |
Step by step guide for an example incident
This section outlines steps taken in the event that monitoring for individuals is required, 1 day after an event resulting in dispersal of 137Cs.
Decide on the monitoring method
Obtain expert help to positively identify the radionuclides.
Let us assume 137Cs has been positively identified.
The monitoring for internal contamination section states that the following radionuclides can be monitored using handheld radiation monitors:
- Cobalt-60 (60Co)
- Selenium-75 (75Se)
- Iodine-131(131I)
- Cesium-137 (137Cs)
- Iridium-192 (192Ir)
Therefore in this case handheld radiation monitors will be used.
Other radionuclides will require different monitoring methods, such as measurement of urine sample. See guidance document HPA-CRCE-014: Guidance on Screening People for Internal Radioactive Contamination.
Additionally, you must ensure that handheld detectors capable of monitoring the radionuclide are available. These details can be found in the section Monitoring for internal contamination. In this case either of the following 3 instruments can be used:
- SAIC Exploranium GR-135
- Thermo Mini 900 with 44A probe
- TSA systems PRM-470CS
Set up a monitoring facility
Monitoring is performed in the local RMU, as detailed in the monitoring location and precautions section.
People with contamination on their skin and clothing must be decontaminated prior to monitoring.
The person to be monitored should normally be at least 5 metres from other potentially contaminated people. However, it is not necessary to separate children from their parents.
Ensure record keeping procedures are in place
Obtain copies of the monitoring record form (see ‘administrative requirements’ section, as part of ‘Monitoring with handheld detectors’.
Assign a ‘unique person code’ to each person and ensure this is entered on the form.
Administrative personnel should be used to help each person to be monitored to fill in their personal details.
When monitoring is complete the results must also be entered on the form.
Perform pre-monitoring checks
Lets us assume a Mini 900 detector with 44A probe is locally available.
The monitoring instrument must be set up as shown in ‘using your local detector’ section.
A battery check must be performed and the instrument response should be checked if a suitable check source is available.
The background count rate in the general vicinity of the monitoring location must also be measured and recorded. Let us assume the background count rate is 5 cps.
Monitoring process
The measurement procedure is shown in the ‘monitoring with handheld detectors’ section.
As the radionuclide is not 131I the detector should be held 30cm from the person’s chest.
The reading is allowed to stabilise and the highest value seen recorded. Let us assume this value is 100 counts per second.
This value must be recorded on the monitoring record form.
Comparing results with action Levels
The net count rate is calculated as shown in the ‘monitoring with handheld detectors’ section.
In this case, the net count rate is 100 minus 5 which is 95.
Action levels are given in the ‘using your local detector’ section.
In this case, the Thermo Mini 900 with 44A probe has been used to monitor adults for 137Cs intake 1 day after the incident. The action level would therefore be 70 cps.
The action level is exceeded. You must urgently refer the individual for medical assessment. Arrangements must be made for more accurate measurements to be made.